
Tuesday 31 December 2013
Thursday 12 December 2013

Wednesday 11 December 2013
Genre Survey
I decided to go around school and ask a few people personally what their favorite film genre was and why. I didn't want to just rely on the survey i did on survey monkey because people could easily just click anything which could lead to less reliable information By me going around and asking personally i felt more confident with my research as i felt i was getting honest opinions.
Focus Pulling
Focus Pulling

A focus puller is a member of the film crew’s camera department whose primary responsibility is to maintain image sharpness on whatever subject or action is being filmed. "Pulling focus" refers to the act of changing the lens’s focus distance setting in correspondence to a moving subject’s physical distance from the focal plane.
But I don't think we will need to use this effect.
Tuesday 10 December 2013

Monday 9 December 2013
Camera Angles
Camera angles and movements combine to create a sequence of images, just as words, word order and punctuation combine to make the meaning of a sentence. You need a straightforward set of key terms to describe them.
Describing Shots
When describing camera angles, or creating them yourself, you have to think about three important factors
— The FRAMING or the LENGTH of shot
— The ANGLE of the shot
— If there is any MOVEMENT involved
1 . Extreme long shot

Extreme Long Shot
This can be taken from as much as a quarter of a mile away, and is generally used as a scene-setting, establishing shot. It normally shows an EXTERIOR, eg the outside of a building, or a landscape, and is often used to show scenes of thrilling action eg in a war film or disaster movie. There will be very little detail visible in the shot, it's meant to give a general impression rather than specific information.
The extreme long shot on the left is taken from a distance, but denotes a precise location - it might even connote all of the entertainment industry if used as the opening shot in a news story.
2. Long Shot
This is the most difficult to categorise precisely, but is generally one which shows the image as approximately "life" size ie corresponding to the real distance between the audience and the screen in a cinema (the figure of a man would appear as six feet tall). This category includes the FULL SHOT showing the entire human body, with the head near the top of the frame and the feet near the bottom. While the focus is on characters, plenty of background detail still emerges: we can tell the coffins on the right are in a Western-style setting, for instance.
3. Medium Shot
Contains a figure from the knees/waist up and is normally used for dialogue scenes, or to show some detail of action. Variations on this include the TWO SHOT (containing two figures from the waist up) and the THREE SHOT (contains 3 figures...). NB. Any more than three figures and the shot tends to become a long shot. Background detail is minimal, probably because location has been established earlier in the scene - the audience already know where they are and now want to focus on dialogue and character interation. Another variation in this category is the OVER-THE-SHOULDER-SHOT, which positions the camera behind one figure, revealing the other figure, and part of the first figure's back, head and shoulder.
4. Close-Up
This shows very little background, and concentrates on either a face, or a specific detail of mise en scène. Everything else is just a blur in the background. This shot magnifies the object (think of how big it looks on a cinema screen) and shows the importance of things, be it words written on paper, or the expression on someone's face. The close-up takes us into the mind of a character. In reality, we only let people that we really trust get THAT close to our face - mothers, children and lovers, usually - so a close up of a face is a very intimate shot. A film-maker may use this to make us feel extra comfortable or extremely uncomfortable about a character, and usually uses a zoom lens in order to get the required framing.
5. Extreme Close-Up
As its name suggests, an extreme version of the close up, generally magnifying beyond what the human eye would experience in reality. An extreme close-up of a face, for instance, would show only the mouth or eyes, with no background detail whatsoever. This is a very artificial shot, and can be used for dramatic effect. The tight focus required means that extra care must be taken when setting up and lighting the shot - the slightest camera shake or error in focal length is very noticeable.
Friday 6 December 2013
The Wolverine Analysis & Review
The Wolverine Analysis & Review

The film begins with a wide shot of a landscape, then the camera slowly
pans to the right and we are given more of an idea of where this scene is
located. Whilst the camera pans we hear planes drowning (Diegetic
audio) followed by the sound of sirens. The Camera pans and halts at an
establishing shot where the audience can identify that scene is located at
military base, furthermore we hear shouting in Japanese which tells us that the
base were looking is in Japan. Next we see a point of view shot, and the camera
is looking at the camp site through a thin gap. We are then presented with
another establishing shot and we can see place of where the person was looking
through the gap. The camera slowly zooms in on the place whilst people run in
and out of the shot. We then see an Over the shoulder shot of the person
looking through the whole again, but this time we can see some of the persons
face, at this point the audience can identify the character as Wolverine,
however there hasn't yet been an establishing shot to validate it.
Review
Before watching the film I had heard that the film wasn't that good,
however when I watched the film for myself I found out this was not the case.
The Wolverine was action packed and formed a nice bridge between the previous X
men movie (X- Men Last Stand) and the follow up (X-Men: Days of Future Past).
This is the second solo wolverine movie; however I did not find
myself disappointed with it like I was with the first one. The only
slight critiques I have for the film was the use of swear words. Whenever
they were used they sounded out of place and did not suit the character and you
kind of felt like it were forced. Hugh Jackman 100% delivers again as wolverine
in this movie, we a switch between wolverine being strong and powerful to weak
and vulnerable and back to being strong again. This created a roller coaster
effect throughout the movie and kept you thinking what could happen next. The
film is mainly based in Japan, which gave the film a fresh new story line and a
new feel to the Sixth instalment of the X-Men films.
Film Rating


Monday 2 December 2013

Saturday 16 November 2013
Fortnight Movie Watch #1
Inception Opening Review and Analysis

Inceptions title sequence was not at the start of the film, however the opening sequence is still analyzable regardless because it contains key information which helps to build up the films story plot. The introduction music is non diegetic music and is used while the production company logo's are displayed. Instantly the scene is set as we see crashing waves and a beach. Diegetic sound comes the waves crashing against on the rocks on the beach. We are instantly introduced to the main character of the film and lead actor of the film (Leonardo DiCaprio). We are also presented with two children that are playing on the beach. At this moment in time we are unclear of the relation and connection between the man laying on the beach and the children playing on the beach. This causes viewers to wonder what is going on and engages the the audience as they wish to know what this scene means.A Gun is pressed on the back of the mans back and shortly after the person with the gun is revealed to the audience. This adds more confusion to the scene because we have just gone from seeing kids playing on a beach to a man being threatened with a gun. The two scenes are juxtaposed by us seeing the man being pressed with gun whilst we still hear the sound of the kids playing. We are then presented with an establishing shot where can now see in more detail where the scene is set. We already knew that the location was at beach however the establishing scene verifies this and allows the audience to see where the characters are currently located.
Review
The film was really good kept me engaged and entertained even though the film was very long. It had a very smart story line that worked well.
Film Rating

Film Techniques
1. Over-the-shoulder shots

Over-the-shoulder
shots are just
what the name says: a shot with an actor’s shoulder in the foreground, out of
focus. A good over-the-shoulder shots are some of the most time-consuming to
shoot correctly, because you need to make sure that there is neither too much
nor too little shoulder in the frame. However, in my opinion no serious
filmmaker can afford not to learn this technique because it is narratively
essential in many cases. Some directors openly say that they never shoot
over-the-shoulder shots precisely because it takes ages to get the look they
want and frequently can’t do it at all, but in my opinion they are missing out.
From a narrative point of view,
over-the-shoulder shots draw the viewer in by creating a sense of intimacy,
depending on how much of the screen area the shoulder in the foreground
occupies. As I wrote above, the key to making the shot work is to get exactly
the right amount of shoulder in the shot. The way to do this is to work with
the actor over whose shoulder you are shooting to make sure that
he/she is leaning into the shot by exactly the right amount. It takes practice,
and is one of those uncelebrated but essential film techniques that even the
most experienced directors don’t always have. I always take my time to frame
the perfect over-the-shoulder shot in my work and it is worth the effort, and
the actors appreciate the final results. Read my detailed guide on how to
frame over-the-shoulder shots.
2. Tilt shots
Tilting up or down is one of the
simplest camera techniques there are. Due to its simplicity it tends to be
overused and/or poorly executed. The truth is that well-executed tilting,
combined with some interesting action and with perfect coordination between the
camera operator and the action, can be incredibly elegant in their simplicity.
If you want to see further examples of tilt shots and the circumstances that
make them appropriate, check out pretty much any film by Steven Spielberg,
especially “Schindler’s list.”
Recommended
best practices for the execution of good tilt shots:
- Set up the shot in such a way that
you can tilt straight up or down, without mixing it with panning. If you can set
up the shot in this way, you can lock off the panning axis of your fluid head
so that it can only tilt and not pan. This will make the tilt shot very pure
and elegant. Obviously there are certain circumstances in which tilting
combined with panning — a diagonal movement — is the best option. What I’m
saying here is that you should not mix tilting with panning just because you
failed to set up the shot properly. If you are tilting up or down to move from
one subject to another along the vertical axis, set up the shot in such a way
that you can execute it with the panning axis completely locked off.
- Tilt shots (and panning shots) should
be executed smoothly and confidently, without overshooting the final frame and
then backtracking clumsily to re-establish framing, unless of course you
actually want that look. It is perfectly possible to do a whip-tilt — a very
fast tilt from one framing to another — with an instant lock-off and very
precise framing, but you will need a highly competent and experienced camera
operator. For ambitious film work, experienced camera operators are worth every
penny and essential to realizing the director’s vision.
3. Panning
shots
Panning the shot is the horizontal
equivalent of tilt shots. Like tilt shots, panning shots are conceptually
simple and therefore usually overused and/or poorly executed. Exactly the same
best-practice considerations made for the tilt shots apply to panning shots:
try and design them in such a way that you can lock off the tilt axis in order
to keep the panning pure, and hire a competent camera operator, especially if
your shots require precise timing and framing accuracy. Once again I will refer
you to any of Steven Spielberg’s films as an excellent source of
well-executed panning shots, that are so well-motivated and well-executed as to
be almost unnoticeable (because they draw you into the story as opposed to
distracting you from it).
Friday 15 November 2013
Thursday 14 November 2013

Wednesday 13 November 2013

Tuesday 12 November 2013
Movie Company Logos
The 20th century Fox intro
Warner Bros. Intro
Universal Intro
Paramount Pictures
About Paramount Pictures 100th Anniversary:
The only major studio still located in Hollywood, Paramount Pictures celebrates its 100th year in show business in 2012. Adolph Zukor, Jesse L. Lasky and Cecil B. DeMille are credited as Paramount's principle founders, with Queen Elizabeth being the studio's first feature film in 1912. Through a century of excellence, Paramount has set the standard in cinema and continues to deliver the highest caliber of entertainment to audiences worldwide.
Friday 8 November 2013
Full analysis of Step Up opening sequence
Step up
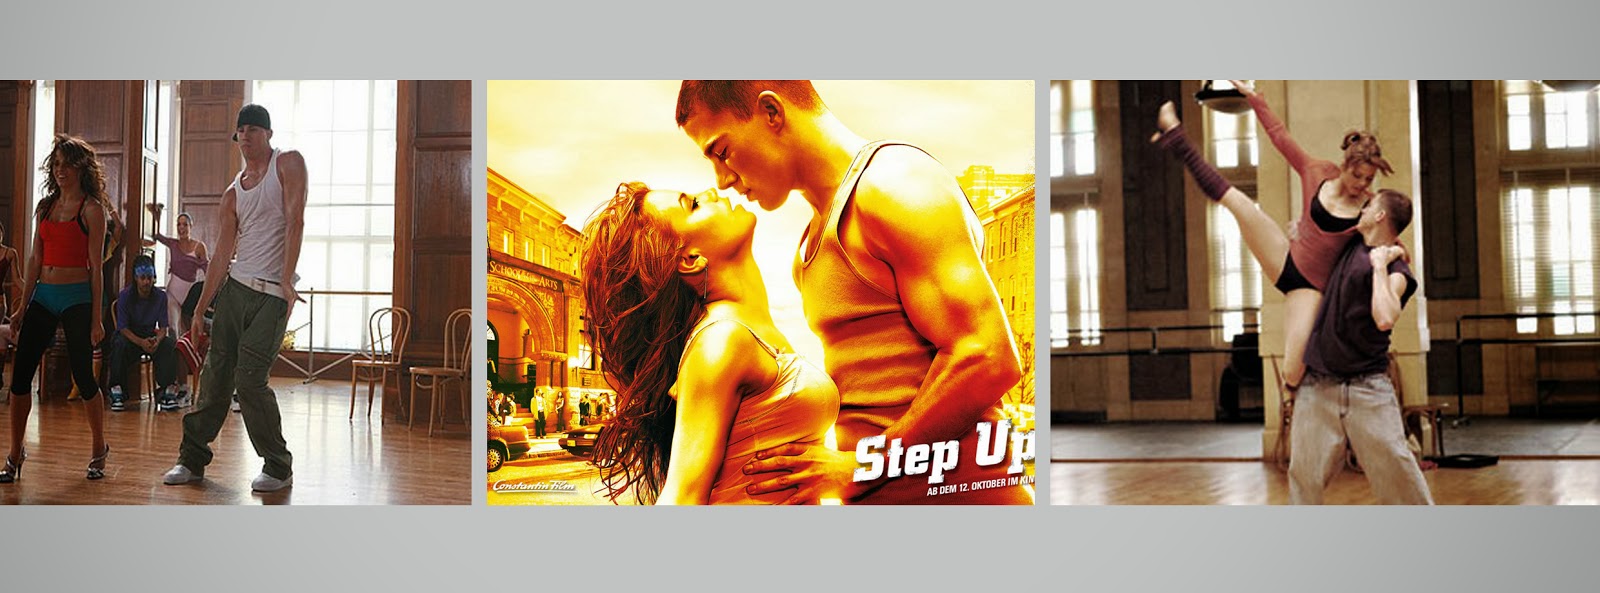
0:06 to 0:12 - we are presented with a dance studio filled with ballet dancers stretching and warming up. we view this from a still mid shot. shortly after credits being to show up on the screen 'summit entertainment, which is the film studio/company that created the film. We see a fade transition and the screen goes blank
0:12 to 0:20 - We are now presented with street dancers preparing to dance outside and shortly after credits pop up on the screen. We see this for 3 seconds then we see a fade transition back to the previous shot with the ballet dancers. Throughout the following seconds the shots flicker back and forth from the streets dancers to the ballet dancer. At 0:17 we are finally presented with the film title, the text flickers and each letter spins around and then music begins to play.
0:20 to 0:32 - The shots continue to flicker from the two environments. Both groups dance and move in similar ways whilst the shots jump. At 0:27 the name of the main actor pops up on the screen followed by the lean actress in the film. The titles appear on the right hand side of the screen however the film title appeared in the center.
0:32 to 1:57 - For this time period we continue to see the mix of street dancer and ballet dancers dancing. The types of angles and shot co ordinate with each other, for example when there is a low angle shot of the streets dancers where we can see only there legs, we see the exact same shot with the ballet dancer and we can only see their legs as well. The titles go from the most important actors in the film to the directors and covers all the conventions of a opening title sequence.
Weaknesses
Weaknesses
- The titles are way to small and are barely visible
- There so much going on that you don't have time to pay attention to the credits
- The credits are not on the screen long enough
Strengths
- The transitions are smooth
- everything coordinates well and goes with the music
- An entertaining opening
Tuesday 5 November 2013
Skyfall Title Sequence Analysis
Skyfall
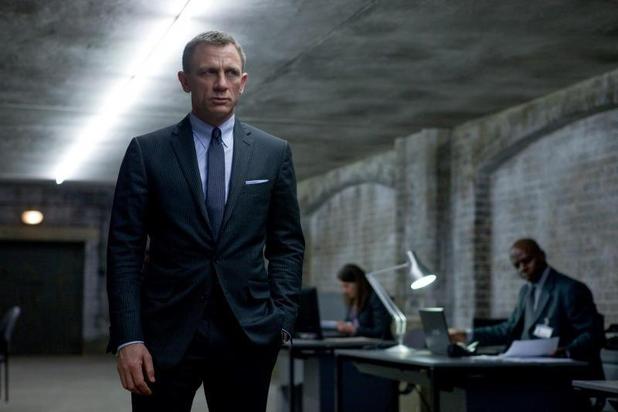
Strengths
- Creative
and unique
- Very
entertaining – keeps the audience looking at the screen
- Smooth
flow and everything transitions well
Weaknesses
- Text is too small
- Possible to get distracted and not pay attention to the titles
Friday 25 October 2013
Man Of Steel Title Sequence analylsis
Man of Steel

Strengths
- Engages the viewer with what’s going on
- Enough time to look at and read the titles
- Smooth transitions
- Background audio coordinates with the images being displayed
- Clear to understand what is going on
- Simple and effective
Weaknesses
- Text is too small
- Possible to get distracted and not pay attention to the titles
- Main actors where not highlighted or made significant
Tuesday 22 October 2013
Subscribe to:
Posts (Atom)